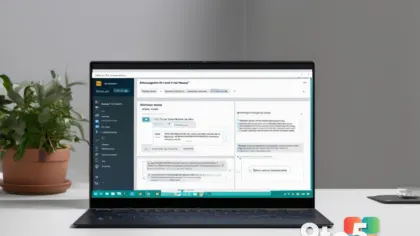
Windows 11 ships with a screenshot tool that most people reach for without a second thought. The Snipping Tool has quietly gained a feature worth knowing about: the ability to permanently redact sensitive information from an image before you share it. If you want to redact screenshots in Windows 11 without pulling in third-party photo editors, this built-in option is exactly what you need.
If you’ve ever screenshotted a chat thread, an email, or a settings panel and then worried about a phone number, account ID, or address leaking into the background, this is the fix. Here’s exactly how it works and how to use it.
What the redaction feature actually does
Redaction is different from the highlighter, pen, or marker tools you’ll find in the Snipping Tool. Those annotations simply sit on top of the image and can be erased at any time. Redaction is permanent: it overwrites the pixels in the area you select so the underlying content is destroyed, not just covered up.
Think of it like dragging a marker across a printed document. Once you blur a name out of a screenshot, that text cannot be recovered from the image file itself. That’s the entire point of the feature — it lets you share a screenshot of a sensitive screen without accidentally handing over the details you meant to hide.
How to redact screenshots in Windows 11
Open the Snipping Tool. You can find it by typing “Snipping Tool” into the Start menu search, or press Windows + Shift + S to grab a snip and then click the thumbnail that pops up to open it in the editor.
Once your screenshot is open in the editor, look for the Redact option along the toolbar. In the current version of the tool it appears as an icon — a small box with a blur-style mark. Select it, then drag a box over the area you want to hide.
When you release the mouse, the selected region fills with a solid blur. You can add as many redaction boxes as you need, covering phone numbers, addresses, account details, or whatever else happens to land inside the frame.
Finally, save or export the image. The redacted version is what gets written to your computer and what you can paste or send elsewhere. The sensitive data is gone from that file.
What to know before you share
Because redaction is permanent, there’s no undo that brings the original pixels back. If you redact the wrong area, you’ll need to go back to your original screenshot and start over — which is another reason to keep the unredacted copy around until you’re certain the share is going out.
Also worth noting: redaction only affects the image you’re editing. If you’ve already sent a screenshot before redacting it, the original still exists wherever you delivered it. Redaction protects the copy you’re about to share; it doesn’t reach back and scrub files that have already been distributed.
Some builds of the tool let you copy the redacted result or save it as a new file while leaving your original untouched. Check the save options so you know whether you’re overwriting the source image or producing a separate redacted one.
What this means for you
For everyday users, this closes a real privacy gap. We screenshot things constantly — error messages, receipts, chat threads, config screens — and it’s easy to overlook a detail in the corner that shouldn’t travel with the image. Having a built-in, no-install way to scrub that out means you don’t have to reach for a web tool or a separate app just to hide a few pixels.
It’s also handy for anyone who posts help requests on forums or social media. Instead of cropping tightly and hoping you caught everything, you can redact the sensitive bits and still show the relevant part of the screen.
How to get it
The redaction feature is part of the Snipping Tool already installed on Windows 11, so there’s nothing to download. If you don’t see the Redact option, make sure the Snipping Tool is up to date. It’s delivered through the Microsoft Store, so open the Store, go to your Library, and check for updates — a newer build of the tool is what includes the redaction controls.
One caveat: feature availability can vary by build. If the Redact button is missing entirely, you may be running an older version of the Snipping Tool, in which case updating through the Microsoft Store is your best bet.
Until then, the Windows + Shift + S shortcut still grabs a snip, and the Snipping Tool’s standard editing tools handle the rest. It’s just the redaction piece that turns a plain screenshot into something safe to share publicly.
Source: Neowin
Over to you: Do you trust the Snipping Tool’s redaction to hide sensitive details, or do you still reach for a third-party editor before sharing screenshots?