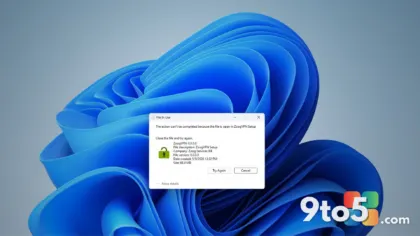
Being the go-to tech support for parents and relatives is a thankless job. One minute you are explaining how to clear a browser cache, and the next you are untangling a screen taken over by a pop-up claiming to be Microsoft support. The requests never really stop, and they often point to the same underlying issue: a lack of foundational security habits.
Instead of answering the same questions over and over, the most effective solution is to hand them a reference guide. After years of helping family members secure their devices, I have compiled a list of the most critical Windows security settings that should be configured once and checked regularly. These steps are not about advanced IT knowledge; they are about building a baseline of protection that works for everyone.
Fix these security flaws today
Some settings require immediate attention because they leave your device exposed to common threats. These are the low-effort changes that deliver the highest security return.
#1 Enable Windows Hello
Biometric authentication is one of the most practical upgrades you can make to a daily driver. Windows Hello allows you to sign in using a facial scan, fingerprint, or PIN. It removes the friction of typing passwords while making it significantly harder for someone to access your device physically.
To set this up, open Settings and navigate to Accounts > Sign-in options. You will see the available methods listed there. If your device has a compatible camera or fingerprint reader, you can configure it in just a few minutes. This setting is especially useful for older relatives who struggle with complex passwords but can easily use a face or finger to unlock their screen.
#2 Keep Windows Update Active
Operating system updates are not just about new features; they are the primary delivery mechanism for security patches. When updates are paused or ignored, known vulnerabilities remain open for attackers to exploit.
Check the status by going to Settings > Windows Update. If you see a message indicating that updates are paused, click Resume updates. It is also wise to click Check for updates manually to ensure the system is pulling the latest security definitions. For family members who are unsure, leaving this on automatic is the safest default.
#3 Verify Windows Defender Is Running
Windows Defender, now branded as Microsoft Defender Antivirus, comes preinstalled on every modern Windows device. It is surprisingly effective at blocking malware, ransomware, and phishing attempts without the need for third-party software.
Navigate to Settings > Privacy & security > Windows Security > Virus & threat protection. Confirm that Real-time protection is toggled on. If you have installed another antivirus program, Windows will automatically disable Defender to prevent conflicts. Ensure that the third-party software is active and that you are not left in a half-protected state.
#4 Turn On Find My Device
Laptops are portable by design, which makes them prime targets for theft or easy misplacement. Enabling Find My Device adds a layer of recovery that can mean the difference between a lost device and a recovered one.
Go to Settings > Privacy & security > Find my device. Toggle the feature on and ensure that location services are permitted for the system. Once enabled, you can log into the Microsoft account portal from any browser to see the device’s last known location. You can also issue a remote lock command to prevent unauthorized access if the laptop goes missing.
Perform these security measures once and for all
These steps require a bit more initial effort but provide long-term protection. They address account recovery, data privacy, and system permissions.
#5 Switch to a Microsoft Account with Two-Factor Authentication
Local accounts store credentials only on the device itself. If the hardware fails or the password is forgotten, recovery becomes difficult. A Microsoft account ties your login to an email address, enabling cloud sync, license management, and remote password resets.
Visit Settings > Accounts > Your info to convert a local account to a Microsoft account. Once signed in, head to myaccount.microsoft.com and enable two-factor authentication (2FA). This requires a second verification step, usually a code sent to your phone, whenever someone tries to log in from a new device. It is one of the most effective barriers against account takeover.
#6 Enable Device Encryption
If a laptop is stolen, the data inside is only as secure as the drive’s encryption. Without it, a thief can remove the storage drive, connect it to another computer, and access all your files, photos, and documents.
Windows 11 includes built-in encryption for this exact purpose. On Windows 11 Home, it is labeled Device encryption, while Windows 11 Pro uses BitLocker. Navigate to Settings > Privacy & security > Device encryption and toggle it on. The system will encrypt the drive in the background. Make sure to back up the recovery key to your Microsoft account so you can regain access if the system ever requires it.
#7 Use a Standard Account for Daily Tasks
By default, the first account created on a new Windows PC is an Administrator account. This gives the user full control over system changes, which is convenient but risky. If malware infects an admin account, it can modify system files and bypass security prompts.
Create a second account with Standard user privileges for everyday use. Navigate to Settings > Accounts > Family to add or modify accounts. Use the Standard account for browsing, email, and documents. Only switch to the Administrator account when you need to install software or change system settings. This limits the damage any single malicious program can do.
#8 Adopt a Password Manager
Trying to remember unique, complex passwords for dozens of accounts is nearly impossible. Most people end up reusing the same password everywhere, which means a breach on one site compromises all of them.
A password manager generates and stores strong, unique passwords in an encrypted vault. You only need to remember one master password to access everything else. Popular options include NordPass, 1Password, Bitwarden, and Proton Pass. Even the Edge browser includes a built-in password manager that can help users transition away from writing credentials on sticky notes.
Build better cybersecurity habits
Settings alone cannot stop every threat. Human behavior remains the largest variable in security. Teaching family members how to recognize social engineering and suspicious activity is just as important as configuring software.
#9 Learn to Spot Phishing Scams
Phishing attempts can arrive via email, text message, or compromised websites. They often mimic legitimate companies to trick users into revealing personal information or downloading malicious files.
Teach relatives to hover over links before clicking them. Check the sender’s email address for slight misspellings. Look for urgent language that pressures immediate action. Windows SmartScreen provides a helpful warning layer for suspicious downloads, but it cannot catch every attempt. Encouraging a pause-and-verify mindset is the most reliable defense.
#10 Ignore Unsolicited Tech Support Calls
No legitimate company will call you out of the blue to warn about a virus on your computer. If a caller claims to be from Microsoft, a bank, or an internet provider and asks for remote access to your screen, it is a scam.
The same rule applies to pop-ups. If a webpage displays a flashing alert with a phone number demanding you call for support, close the tab immediately. Never download remote access tools like AnyDesk or TeamViewer at the request of an unsolicited caller. Hang up, block the number, and report the attempt.
What This Means for You
Implementing these Windows security settings does not require a degree in computer science. It is about establishing a routine that keeps devices protected against the most common threats. Start with the immediate fixes like Windows Hello and updates, then move to the foundational changes like encryption and account types. Review the settings every few months to ensure they remain active after major updates.
How to Get Started
Open Settings on the target device and work through the list above in order. Take screenshots of each confirmed setting so the user has a visual reference. For family members who are uncomfortable making changes, sit with them during the initial setup. Once the baseline is in place, the frequency of support requests will drop significantly.
Final Thoughts
Security is not a one-time task; it is an ongoing practice. By configuring these Windows security settings and reinforcing safe habits, you give your family the tools to navigate the digital world with confidence. The goal is not perfection, but a solid foundation that stops the majority of everyday threats before they reach the screen.
Source: Latest from Windows Central
Over to you: Which of these Windows security settings did you already have enabled, and which one will you set up first?