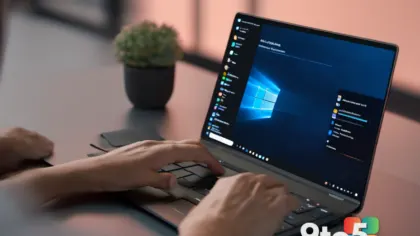
When you drag and drop thousands of files or paste a huge folder into File Explorer, the transfer can stall, drop, or leave you staring at a progress bar that never finishes. Robocopy (short for Robust File Copy) is Windows’ built-in command-line tool built for exactly this kind of job. It copies large batches of files with built-in retries, resume capability, and detailed logging, which is why administrators have relied on it for years.
This guide shows you how to use robocopy to move large amounts of files reliably, whether you’re swapping data between drives, migrating to a new PC, or backing up a full folder. You don’t need any third-party software, and the whole process takes just a few minutes once you know the right flags.
Before You Start: Robocopy ships with Windows Pro, Enterprise, and Education editions. If you’re on Windows Home, the executable may be missing, so check for it in Step 3 before building your command. You’ll also want to know the exact source and destination paths, and enough free space on the target drive to hold the files.
Step 1: Confirm your Windows edition supports robocopy
Press Win + R, type winver, and press Enter. The small window that appears tells you which Windows 11 or Windows 10 build you’re running, so you can confirm whether robocopy is bundled. Pro, Enterprise, and Education editions include the tool by default, while Home editions sometimes need it added through the RSAT tools or the Windows SDK.
If your edition is one of the supported ones, you can skip straight to Step 2. If you’re on Home and the executable is missing later, install the RSAT remote server administration tools or grab the robocopy binary from a matching edition. Knowing this up front saves a frustrating detour halfway through a large transfer.
Step 2: Open a Command Prompt or PowerShell window
Type cmd or Windows PowerShell in the Search box and open it. Both work fine for robocopy, though PowerShell is a little friendlier if you want to paste long commands without the older command-line wrapping quirks. Choose whichever interface you find easier to read.
Opening the window gives you a text-based shell where you can type the robocopy command directly. If you prefer the classic look, Command Prompt is perfectly capable. Either way, keep the window open while the copy runs so you can watch progress and catch any errors in real time.
Step 3: Locate the robocopy executable
Type where robocopy and press Enter. This command searches your system for the robocopy program and returns its file path, typically something like C:\Program Files (x86)\Windows Kits\10\Bin\x64\robocopy.exe. Seeing the path confirms the tool is installed and ready to run.
If the command returns INFO: Could not find files for the given pattern, the executable isn’t on your machine yet, which means you’re likely on a Home edition. Reinstall it via RSAT or copy the binary from another supported PC, then run the where command again. This quick check prevents you from building a whole command for a tool that won’t execute.
Step 4: Learn the basic robocopy syntax
Remember the core pattern: robocopy source destination /options. The source is the folder you’re copying from, the destination is where the files land, and the /options are the flags that control how the copy behaves. A typical source path looks like D:\Backups and a destination like E:\Archive.
Paths with spaces must be wrapped in double quotes, like "D:\My Documents\Photos", so the command reads them as a single argument rather than splitting them apart. Getting this structure right matters because a misplaced flag can turn a careful copy into a partial one. Keep this pattern in mind as you build the full command in the next steps.
Step 5: Run a small test transfer first
Create a tiny test folder with a handful of files and copy it before the big run. For example, run robocopy "D:\Test" "E:\Test" /E to move a small folder using the /E subdirectory flag. Watching a small transfer succeed builds confidence and lets you verify the destination path is writable.
If the test copy fails or produces missing files, you’ll catch the problem on a small scale instead of discovering it after hours of copying a terabyte. Check that every file appears in the destination folder and that subfolders made it through. A quick test here is the cheapest insurance against a botched large transfer.
Step 6: Add the reliability flags for big transfers
Append flags that make the copy resumable and self-healing, such as /MIR /Z /R:3 /W:5 /LOG. The /MIR mirror flag copies everything and removes files in the destination that no longer exist in the source, keeping the folders perfectly in sync. The /Z flag runs in restartable mode, so if the transfer drops, it resumes from where it left off instead of starting over.
By default robocopy retries a failed copy up to 1 million times with a 30-second wait between tries, which can drag a slow file on for hours. Override this with /R:3 (three retries) and /W:5 (five-second wait) so a spotty connection or a large file finishes faster. These numbers are the heart of a reliable large transfer, so adjust them to match how stable your drive or network connection is.
Pro Tip: For very large folders on a fast connection, add /MT:8 to run eight threads in parallel. This multithreaded option (available on Windows 8 and Server 2012 onward) can cut transfer time dramatically, but it works best over a network drive rather than a single local disk where the threads may compete for the same spindles.
Step 7: Run the full copy with a log file
Type your complete command with /LOG:"E:\Robocopy.log" and press Enter. The /LOG flag writes a detailed record of every file copied, skipped, or failed to a text file you can open later. Without it, you’d have no proof of what transferred, which matters when you’re moving gigabytes of irreplaceable data.
For an even richer record, swap /LOG for /LOGV to include verbose details like skipped files and extra attributes. Let the copy run to completion and watch the scrolling output; robocopy prints a summary line for each file, so a steady stream means the transfer is working. When it finishes, the window returns to your prompt and the log file sits waiting in the destination folder.
Step 8: Check the exit codes to confirm success
Look at the bottom of the log or run echo %errorlevel% immediately after the copy finishes. Robocopy uses a clever exit-code system where the low bits mean success and the high bits flag problems. A value of 0 means a clean, error-free copy, while 1 means one or more extra files were copied.
Codes in the range of 8 to 15 signal real trouble, such as files that failed to copy or directories that couldn’t be mirrored. Don’t panic over a 1 or 2 (extras copied), but investigate anything above 8 by opening your log file and searching for the word FAILED. Understanding these codes is how you verify a large transfer actually succeeded end to end.
Troubleshooting
1. The command reports Access Denied or a missing destination folder
This usually means the destination path doesn’t exist yet or your account lacks write permission. Create the destination folder first with mkdir, or type the full path and let robocopy create it. Run the window as an administrator if you’re hitting a permissions wall, and double-check that the destination drive is actually connected and lettered properly.
2. Files copy but some subfolders come up empty
That’s often a flag mismatch rather than a real loss. If you used /MIR without /E, empty subfolders may be skipped, so add /E to include them. Open the log file and compare the file count in the summary against what you expected; a gap usually points to a flag you forgot rather than a lost file.
3. The transfer crawls or stalls on one large file
One stubborn file can hold up the whole batch because robocopy processes files sequentially by default. Split that file into the /MT multithreaded approach, or copy it separately in its own robocopy run so it doesn’t block the rest. Slow network drives are the most common cause, so check your connection and consider copying over a wired Ethernet link instead of Wi-Fi for the biggest folders.
Closing Tips
Robocopy shines for large, fiddly transfers, but it still depends on a stable source and destination, so verify both drives before committing a big batch. Always keep a log file and check the exit codes, because a green-looking transfer can hide silent failures. For ongoing syncs rather than one-time moves, schedule the same command with Task Scheduler to keep folders mirrored automatically.
Once you’re comfortable with the flags, you’ll find robocopy far more dependable than dragging folders around in File Explorer, and it handles multi-gigabyte jobs without a third-party suite. If you’ve tried it for a big move, let us know how it worked out for you.
Closing Question: Have you ever used robocopy to rescue a stalled File Explorer transfer, or do you stick with a GUI tool for your big file moves?
Over to you: Have you ever used robocopy to rescue a stalled File Explorer transfer, or do you stick with a GUI tool for your big file moves?